|
|
|
Kto jest w sklepie?
Sklep przegląda 5867 gości i
1 zarejestrowany klient |
|
Kategorie
|
|
Informacje
|
|
Polecamy
|
|
|
 |
|
|
Dla tego produktu nie napisano jeszcze recenzji!
 ;
Wszystko w porządku.
Instrukcja czytelna i kompletna.
Dziękuję.
all right!
thank you.
;
Bardzo dobra instrukcja. Zawiera wszystko co potrzeba, polecam!
 ;
Instrukcja jest OK. Schematy czytelne, opisane niektóre procedury.
;
Instrukcja bardzo czytelna. zawiera co potrzeba. Polecam
;
...instrukcja serwisowa w pełni czytelna i kompletna. Dziękuję!
RR 630 CD / RR 660 CD Allgemeiner Teil / General Section
prohibited Unauthoris edMade. copying,
in Austria
hiring of the
or rental recorded
of this work
recording reserved.
broadcast ofthe ing, owner
performan the producer ce, and
PLAY/PAUSE 2; � to start and interrupt playback
OPEN/CLOSE
PROG.
ON 6
F-SKIP ON STOP PROG
CD
� to programme track numbers in the memory � lights up when repeat one function is on, blinks when repeat all function is on. � lights up during CD playback, blinks during CD pause mode.
Radio reception
REPEAT 6 � Set the FUNCTION switch to RADIO. � The ON indicator 6 lights up. � Adjust the sound using the VOLUME and UBS controls. � You may connect stereo headphones having a 3.5 mm plug to the jack p. � Inserting the plug will disconnect the speakers. � Select the wave band using the BAND selector. � Tune to a desired radio station using the TUNING control. � When the indicator FM STEREO 6 appears, you are receiving an FM stereo transmitter. � The set is switched off when the FUNCTION switch is in the TAPE/OFF position and no buttons are pressed. �The ON indicator 6 goes out.
R-SKIP REPEAT TRACK
PLAY/ PAUSE
REMOTE SENSOR
with the label facing up. � To remove dust and dirt, breathe on the CD and wipe it with a soft, lintfree cloth in a straight line from the center towards the edge. Cleaning agents may damage the CD. � Do not expose the CD to rain, moisture, sand, or to excessive heat. (E.g. from heating equipment or in motor cars parked in the sun).
TAPE DIRECTION
PLAY/PAUSE 6
Cassette Control
CASSETTE
Warning
CLASS 1 LASER PRODUCT means that the laser´s construction makes it inherently safe so that the legally prescribed maximum permissible ratiation values can never be exceeded. CAUTION: Using any equipment or devices other than those described and specified in these operating instructions, or tampering with the unit in any way, can result in dangerous exposure to radiation.
CLASS 1 LASER PRODUCT
Top and front panel
ON 6
p
VOLUME UBS FUNCTION ANTENNA SCALE BAND TUNING FM STEREO 6 OPEN/CLOSE REMOTE SENSOR
� lights up when the unit is on � connection for headphones � � � � � � � � � � � � to adjust the volume to switch the ULTRA BASS SYSTEM on and off CD: to switch to CD mode / Power On TAPE/OFF: to switch to TAPE mode / Power Off RADIO: to switch to RADIO mode / Power On telescopic aerial for FM reception tuning dial scale to select between FM, MW, and LW waveband to tune to a radio station lights up when receiving FM stereo stations to open and close the CD door to receive the remote signals (only RR 660 CD)
0 B Q R 9//
� � � �
to start recording to start cassette playback fast rewind fast forward
� to stop and eject the cassette � to interrupt/continue playback/recording
; Back panel
Inserting a CD
� Set the FUNCTION switch to CD. � The ON indicator 6 lights up. � Press OPEN/CLOSE to open the CD door. � Insert the AUDIO CD, printed side facing up. � Close the cover. � The CD-player scans the contents list of the CD. After that, the total number of tracks appears on the display.
OIIOIOIO OIO OIOIO OOIOOIOIOI OIOIOIOIO IOIIOIO OIOOOII OIOI OIO OII
Battery compartment: � for inserting 8 batteries type R20, UM1 or D-cells. AC ~ � Socket for mains lead.
CD PLAYER
Playing a CD
� Press PLAY/PAUSE 2; to start playback. � The PLAY/PAUSE 6 indicator will light up and the display shows the track number. � Adjust the sound using the VOLUME and UBS controls. � For brief interruptions, press PLAY/PAUSE 2;. � The PLAY/PAUSE 6 indicator starts blinking � To resume playback, press PLAY/PAUSE 2; again. � To stop playback, press STOP 9. � The total number of tracks will appear on the display. � The CD player also goes to position STOP: � when the end of the CD is reached; � if the batteries run down or if the power supply is interrupted. � To take out the CD, open the CD door by pressing OPEN/CLOSE. � Open the CD door only if the CD-player is in position STOP. Selecting another track during play � Press R-SKIP Q or F-SKIP R several times until the required track number appears in the display. � The selected track begins to play. Starting with a particular track � Press R-SKIP Q or F-SKIP R until the required track number appears in the display. � Play starts automatically from the selected track. Searching for a passage during play � Hold R-SKIP Q down to search backwards to the beginning. � Hold F-SKIP R down to search forwards to the end. Note: This function can be described as �audibly� searching for a title. During the search, volume is reduced and returns to its adjusted level as soon as the button is released.
CASSETTE DECK
Repeat function
Repeating a track � Press REPEAT before or during playback. � The REPEAT 6 indicator lights up. � The track will now be repeated continuously � Press REPEAT twice to stop the track being repeated. Repeating the CD � Press REPEAT twice before or during playback. � The REPEAT 6 indicator starts blinking. � The CD will now be repeated continuously � To switch the repeat mode off, press REPEAT again.
Compact cassettes
� Copyright: Recording is permissible insofar copyright or other rights of third parties are not infringed. � For recording, use a NORMAL (IEC type I) cassette on which the tabs are not broken out. � This deck is not suited for recording on CHROME (IEC II) or METAL (IEC IV) cassettes. � For playback, any cassette type may be inserted. � At the very beginning and end of the tape, no recording will take place during the 7 seconds when the leader tape passes the recorder heads. � To prevent the accidental erasure of a recording, keep the
Cassette playback
� Set the FUNCTION switch to TAPE/OFF. � Press 9// to open the cassette holder. � Insert a recorded cassette. with the open side downward and the full spool on the left. � Adjust the sound using the VOLUME and UBS controls. � You may connect stereo headphones having a 3.5 mm plug to the jack p. � Inserting the plug will disconnect the speakers. � Press B and playback will start. � reaches the end. Playback stops when the tape in the deck � For brief interruptions, press � To restart playback, press this button once more. � To stop, press 9//. � When the end of the tape is reached the B button is released. � The set will be switched off if the FUNCTION switch is in position TAPE/OFF and no buttons are pressed. � The ON indicator 6 goes out.
Cassette recording
� Press 9// to open the cassette holder. � Insert the cassette. � When monitoring during recording, adjust the sound using the controls VOLUME and UBS. These controls do not affect the recording. � Start recording by pressing 0. (the B button is automatically also pressed). � When the end of the tape is reached, the recorder buttons are released. � To interrupt recording, press ;. � To continue recording, press ; again. � Press 9// if you want to stop recording before the end of the tape. On pressing again, the cassette holder will open. � The set is switched off if the FUNCTION switch is in position TAPE/OFF and no buttons are pressed. � The ON indicator 6 goes out. Recording from the CD-player (CD synchro recording) � Set the FUNCTION switch to CD. � It�s not necessary to start the CD player separately: by pressing 0 the CD player starts automatically. � If the CD player is in STOP position, recording will start from the beginning of the CD (or from the beginning of the programmed selection). � To start a recording in the middle of a track, play the CD in the normal way. � As soon as the desired passage is reached, pause the CD and then start recording by pressing 0. Recording from the radio � Set the FUNCTION selector to RADIO. � Select the wave band using the BAND switch. � Tune to desired radio station using the TUNING control knob. � Start recording by pressing 0.
Random function (only RR 660 CD via remote control)
� During playback, press the MODE button on the remote control three times. � The tracks are played in random order until all of them have been played once. � The display indication toggles between the track number and a moving symbol. � The function is deactivated by pressing STOP 9 (in which case the CD stops) or MODE again; in this case the remaining tracks are played in their normal order. � The random function is not possible during playback of a programme.
;.
cassette side to be safeguarded in front of you and break out the left tab. Now, recording on this side is no longer possible. � To render this safeguard ineffective, cover the hole with a piece of adhesive tape. � Do not expose the cassettes to rain, moisture, sand, or to excessive heat. (E.g. from heating equipment or in motor cars parked in the sun). � Do not store cassettes near strong magnetic fields (for example, TV sets, speakers, engines, etc.).
1
Winding the tape
� Press R to search forward to the end of the tape. � Press Q to search backward to the beginning of the tape. � To stop, press 9//.
All rights public of
GRUNDIG Service 1 5
Operating Instructions
Note: This chapter contains excerpts from the operating instructions. For further particulars please refer to the appropriate user instructions the part number of which is indicated in the relevant spare parts list.
CONTROLS
ANTENNA FUNCTION U.B.S. VOLUME
CD TAPE/OFF RADIO
VOL
RADIO
CD Control Radio aerials
� to skip and search backward � to skip and search forward � to repeat one/all tracks � to stop playback � For FM, pull out the telescopic aerial. To improve FM-reception, incline and turn the aerial. Reduce its length if the FM-signal is too strong (very close to a transmitter). � For MW/LW, the set is provided with a built-in aerial, so the telescopic aerial is not needed. Direct the aerial by turning the whole set.
CD PLAYER
CD handling
� Use only Digital Audio CDs which have the symbol .
2
1. AY, 2. HERE AY, 3. SAY WE I 4. THINK ARE 5. NOTHIN' ABOUT NEW YOU
ANTENNA
FM MW LW
SCALE BAND
TUNING
R-SKIP Q F-SKIP R REPEAT STOP 9
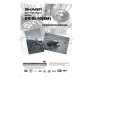
RADIO CASSETTE RECORDER WITH CD RR 630 CD
FM STEREO
TUNING FM STEREO 6
� To take the CD out of its box easily, press the centre spindle while lifting the CD. � Never write on a CD or attach any sticker to the CD. � Always hold the CD at the edge and always store it in its box after use
1
NOW
EPC BIEM/STEMRA 465145 STEREO 2
COMPA DI GI TAL AUDI O CT
6. OYE 7. DON'T MI 8. GET WANNA CANTO 9. YOUR ON (Hear 10. LOVE YOUR LOSE My Voice) 11. CUTS BOTH IS FEET YOU 12. SI VOY CANTO BED FOR ME OYE MI WAYS A PERDERTE (Spanish Version)
|
|
|
> |
|